There’s a saying that goes “there’s a million ways to skin a cat”, it could just as well be a million ways to access resources in a remote network (IPSEC, P2S, VDI…). I chose Tailscale to access my home network because it is easy to use, secure with SSO integration and doesn’t require to punch holes in the firewall so nothing is exposed to the outside world (which is a concept I like). And more importantly, it is Open-Source.
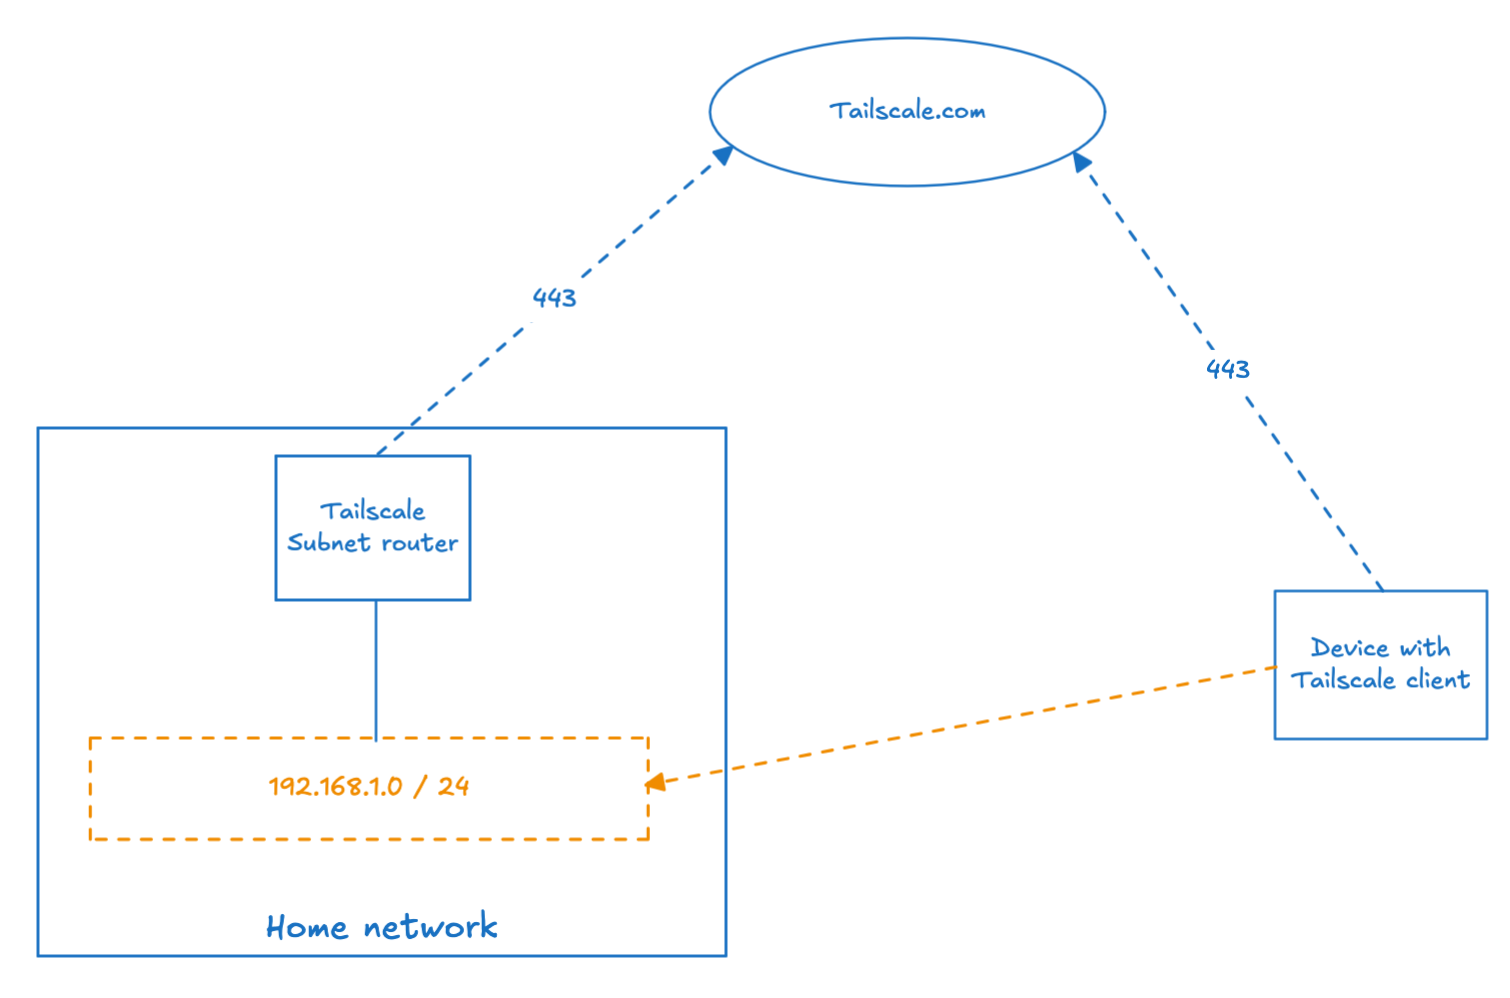
Instead of forwarding a port on the firewall to a VPN server in the LAN/DMZ, the communication with the resources exposed to Tailscale only require outbound HTTPS traffic (443) to tailscale.com. More info on how Tailscale works in their doc. As of the time of this writing, the free plan includes 3 users, 100 devices and most of the feature set. I say “at the time of this writing” because a number of free open-source products have become paid in the last couple of years (which is fair enough as they need to be profitable somehow).
By the way, Teleport is another similar project we use at Giant Swarm and works on a similar basis.
Anyway, in this blog we are talking about a homelab/home network environment and not enterprise practices as I don’t think many companies would use Tailscale in subnet router mode as a traditional VPN to access a LAN (as opposed to registered resources).
What is a Tailscale Subnet Router
A Subnet Router allows you to route traffic to a subnet via Tailscale (tailnet) as opposed to accessing individual resources (ingress, ssh, server…). In a way it acts as a traditional VPN server, which was simply more convenient for me as I want to keep the overhead as low as possible in my home network.
Refer to the official documentation if you want to learn more about subnet routers.
Note that this how-to assumes that you already have a Tailscale account and ArgoCD in your Kubernetes cluster. You can obviously do it without ArgoCD but you will have to “translate” a few things to your use case.
Prepare the Tailscale OAuth Client
- Log in your Tailscale dashboard, go to
Access Controlsand edit the tailnet policy file to create tagsk8s-operatorandk8s.k8swill be owned byk8s-operator. These are default tags used by the helm chart and what we will use in the oauth client.
	"tagOwners": {
		"tag:k8s-operator": [],
		"tag:k8s":          ["tag:k8s-operator"],
	},
- You can also add a rule that will auto-approve the adding of routes to your LAN subnet by a device with the
k8stag (Tailscale Operator).
	"autoApprovers": {
		"routes": {
			"192.168.1.0/24": ["tag:k8s"],
		},
	},
- Then go to
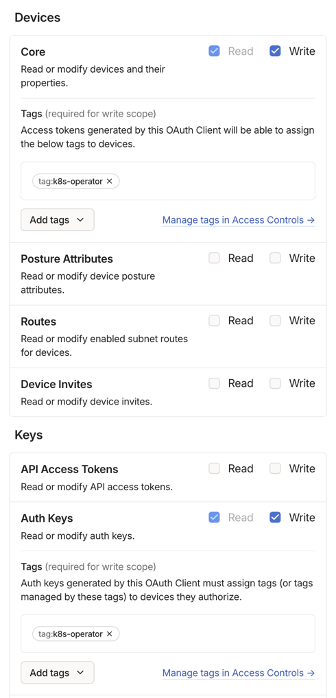
Settings > OAuth clientsand generate a new OAuth client with write privileges on Devices.Core and Keys.Auth Keys. Make sure to add thek8s-operatortag as otherwise the operator won’t be able to create auth tokens.
This will produce a Client ID and a Client Secret. We will store this in a Kubernetes secret for consumption by the operator.
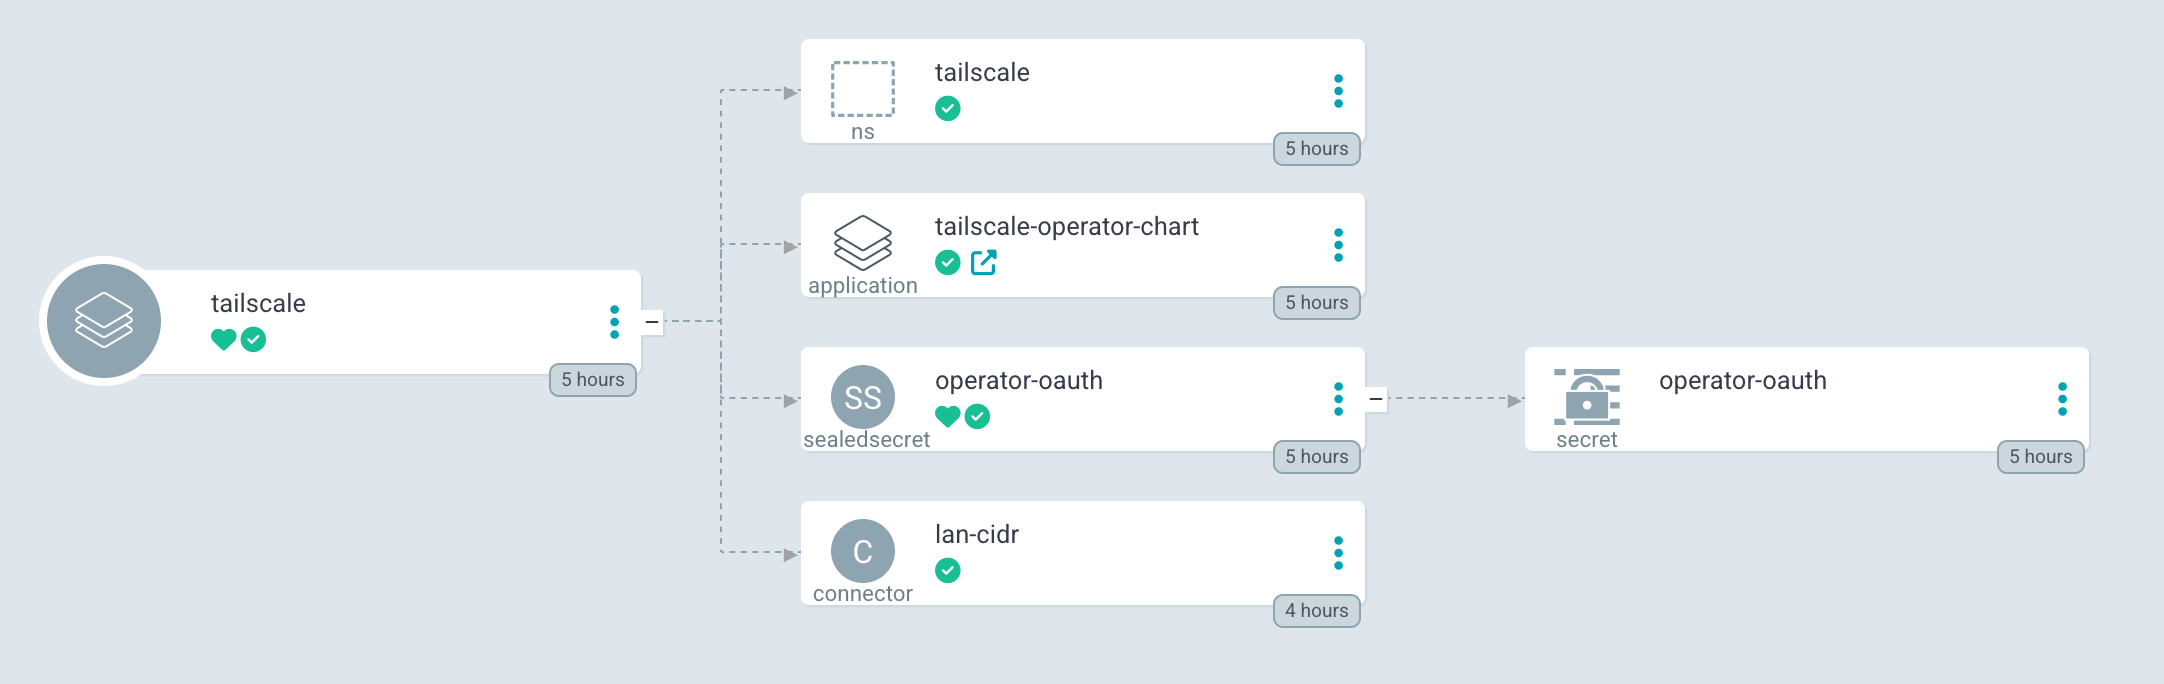
Install Tailscale Kubernetes operator
- Create the
tailscalenamespace.
apiVersion: v1
kind: Namespace
metadata:
  labels:
    kubernetes.io/metadata.name: tailscale
  name: tailscale
- Create a secret for the OAuth client and name it
operator-oauth(secret name used by the helm chart) with fieldsclient_idandclient_secret, like so.
apiVersion: v1
data:
  client_id: <base64 encoded client ID>
  client_secret: <base64 encoded client secret>
kind: Secret
metadata:
  name: operator-oauth
  namespace: tailscale
type: Opaque
Now obviously your mileage will vary depending on how you manage your secret but you definitely don’t want to store it as is in the repo! At home I use Sealed secrets for storing encrypted secrets in Git and I use SOPS at work.
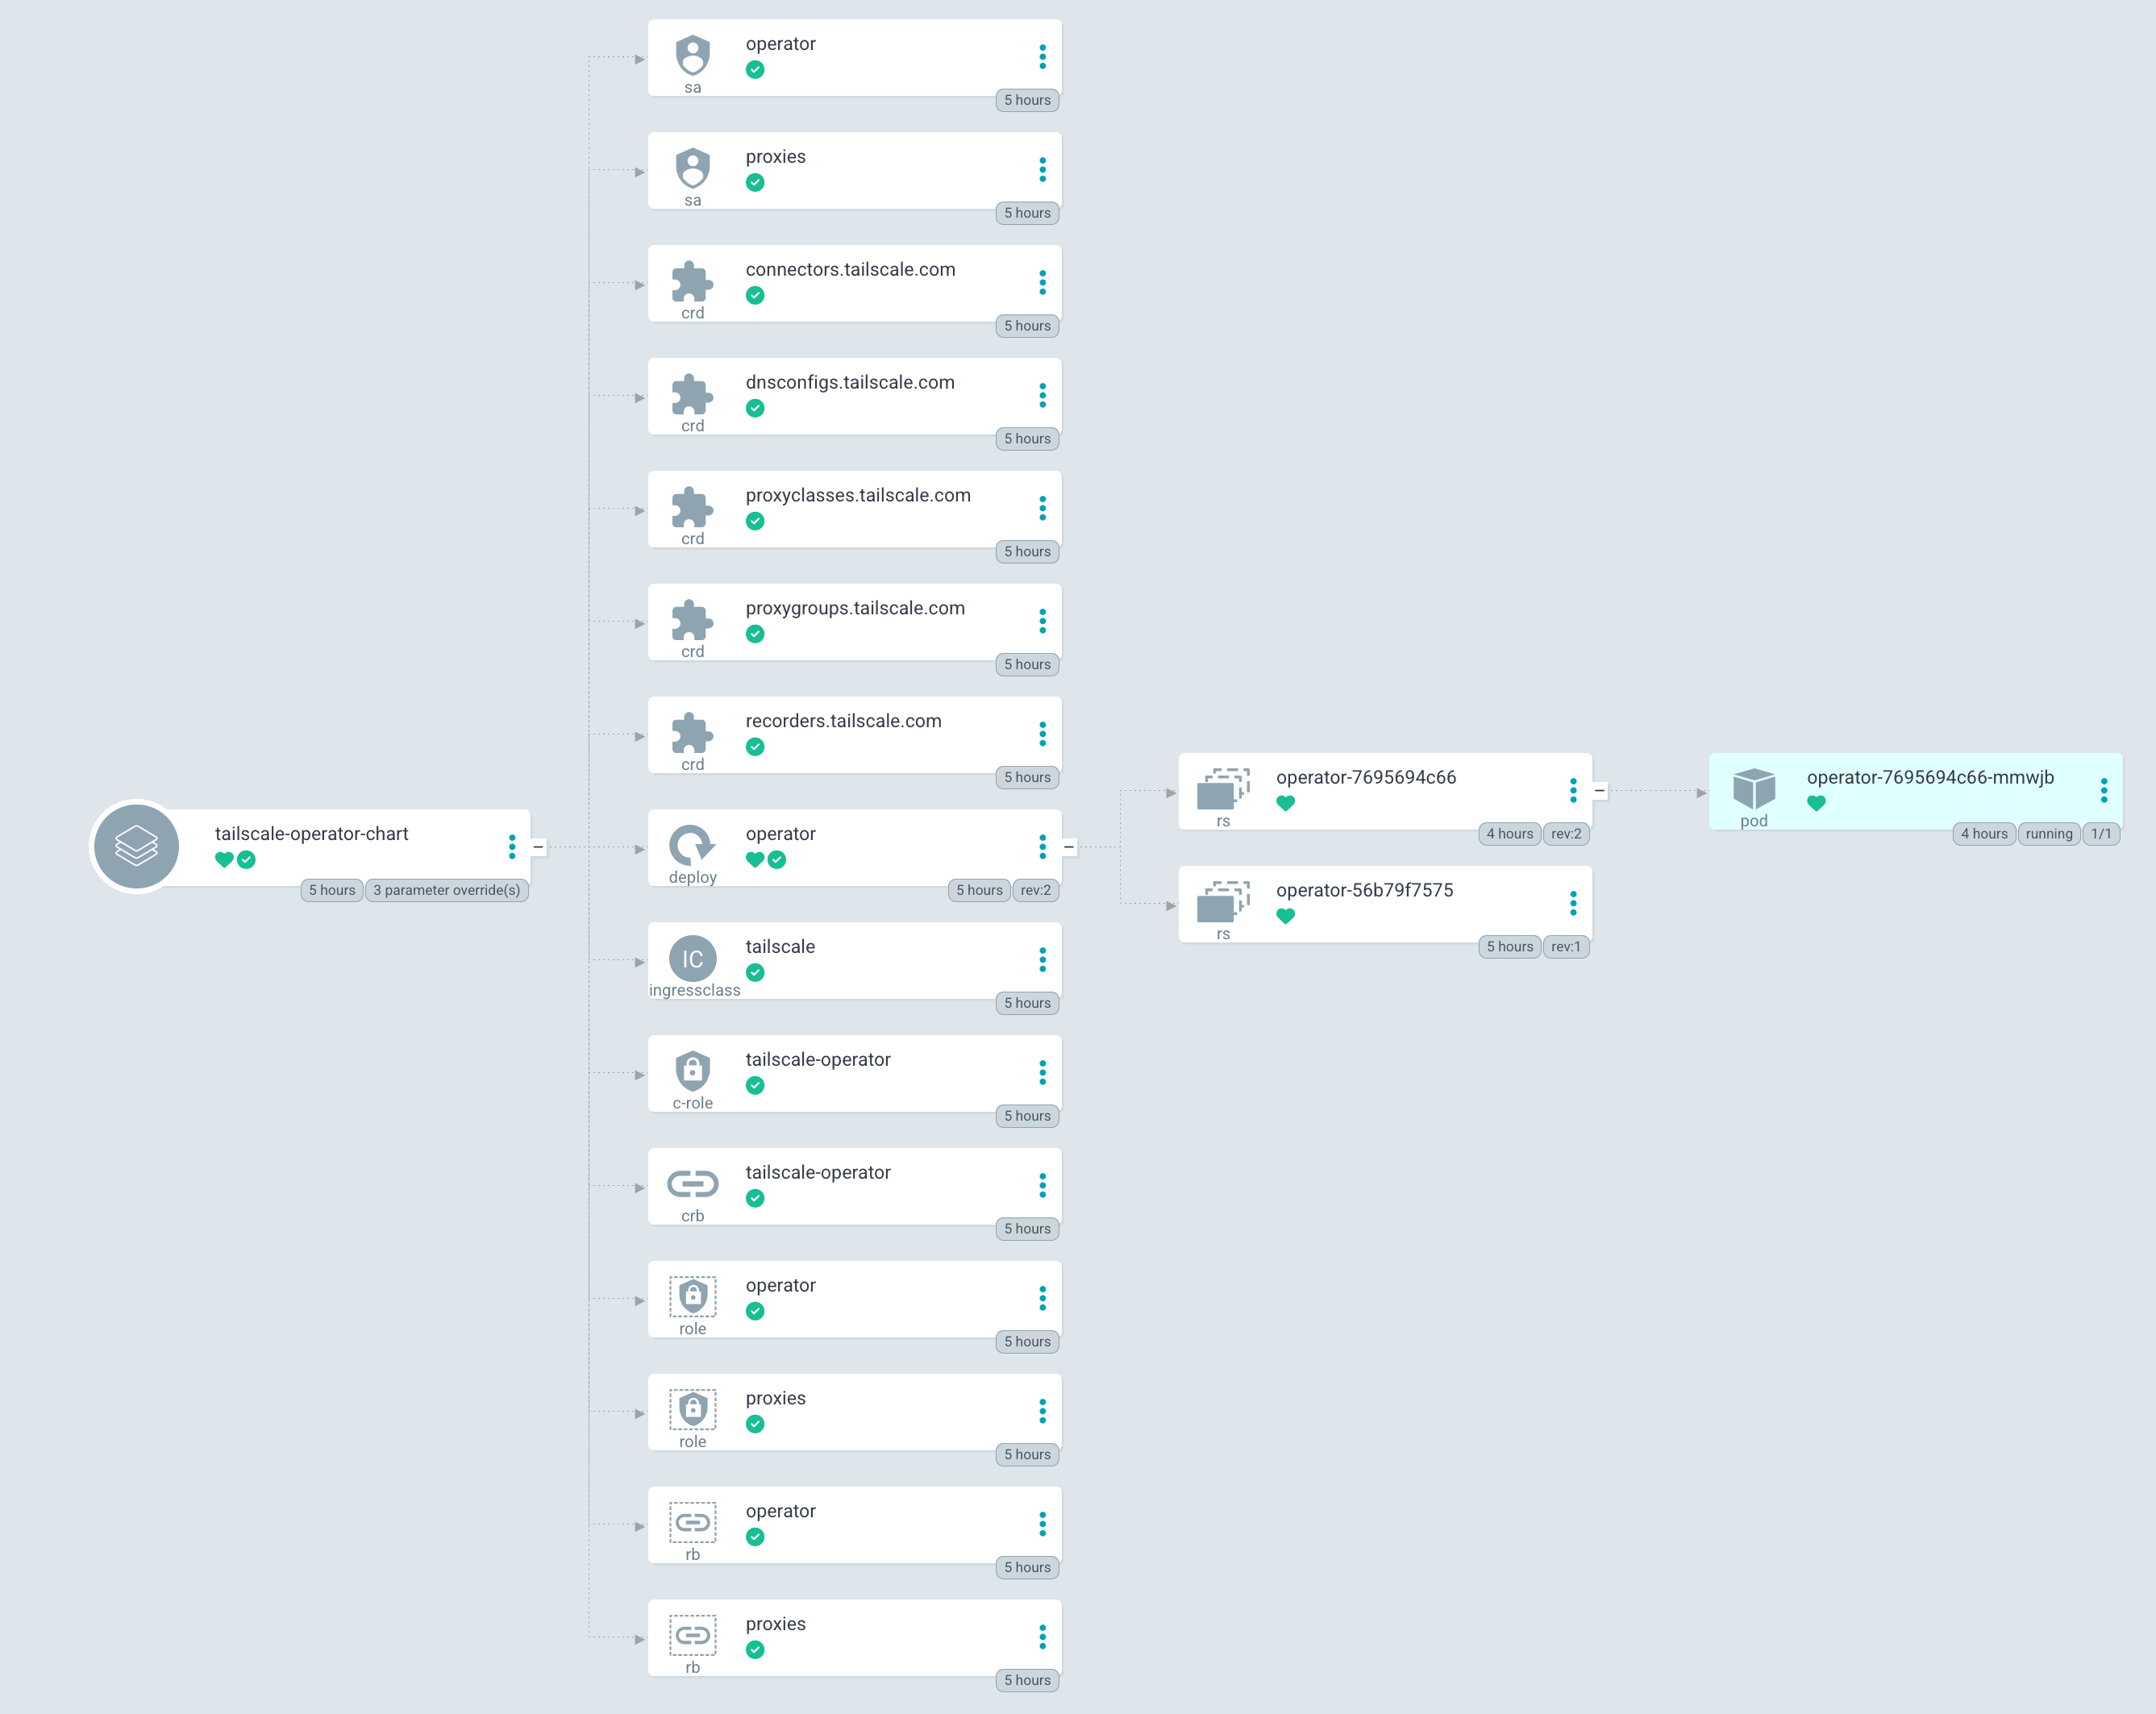
- Create the ArgoCD Helm chart for the Tailscale operator.
I suggest you take a look at the Helm values to see what you will want to change to configure it. I just added a toleration so it can run on my raspberry pi 4.
apiVersion: argoproj.io/v1alpha1
kind: Application
metadata:
  name: tailscale-operator-chart
  namespace: argocd
spec:
  destination:
    namespace: tailscale
    server: https://kubernetes.default.svc
  project: default
  source:
    chart: tailscale-operator
    helm:
      values: |
        operatorConfig:
          tolerations:
          - key: "hw"
            operator: "Equal"
            value: "raspberrypi"
            effect: "NoSchedule"
    repoURL: https://pkgs.tailscale.com/helmcharts
    targetRevision: v1.80.3
  syncPolicy:
    automated:
      prune: true
      selfHeal: true
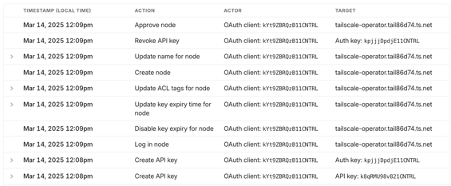
You can already commit this to your repo to make sure that the operator has access to your tailnet and managed to register itself with an ephemeral key.
you should see a new machine in your tailnet:

Create subnet router via Kubernetes operator CRD
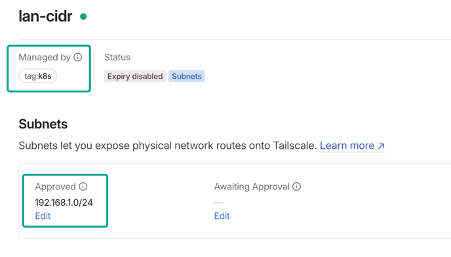
- Now we will create the subnet router. This operation is simplified by the operator as the subnet router is represented by a CRD of type
connectors.tailscale.com. Here we just need to specify the subnet we want to advertise in Tailscale:
apiVersion: tailscale.com/v1alpha1
kind: Connector
metadata:
  name: lan-cidr
spec:
  hostname: lan-cidr
  subnetRouter:
    advertiseRoutes:
      - "192.168.1.0/24"
Give it a few seconds and you should again see a new machine in the tailnet. If you added auto-approve for the k8s tag, the subnet should already approved. If not you will have to do it manually.
And that’s it! Now you can access your LAN from any device with Tailscale connected to your tailnet. Note that it won’t work if the network your are in uses the same subnet (192.168.1.0/24 in my case). I want to change it at some point but it would be somewhat hard work with all the IOT stuff so.. maybe later.
Bonus points: Tailscale ArgoCD app
My ArgoCD apps are defined in git as well, meaning I don’t have to go in the UI and create a new app. If this is also your case, the app will look something like this:
apiVersion: argoproj.io/v1alpha1
kind: Application
metadata:
  name: tailscale
  namespace: argocd
spec:
  destination:
    namespace: tailscale
    server: https://kubernetes.default.svc
  project: default
  source:
    directory:
      recurse: true
    path: <path from repo root to folder hosting tailscale manifests>
    repoURL: [email protected]:<git user>/<git repo>.git
    targetRevision: main
  syncPolicy:
    automated:
      prune: true
      selfHeal: true
Tailscale Argo app
Tailscale Operator chart app
On a side note, if you are looking for options on how to protect your data, Nakivo Backup & Replication offers capabilities to back up data from many types of workloads which can be recovered in case of a data loss event.
